Category Archives arts and crafts

A Pirate Craft Party

It should not be a surprise that I love to knit, crochet, and craft in general. I have all of my life really and it appears that my youngest kiddo is the same. If given an option of playing a board game or making a craft, JSL would likely select the craft ninety percent of the time.

When we asked JSL if he wanted to have a birthday party and invite some of his friends from school he said yes. Then, we had to brainstorm about places to have the party. One weekend afternoon, we happened to be at Jo-Ann Fabrics and Crafts store picking up some fabric. They had some tables set up in front for classes. I happened to ask if they did birthday parties. Yes, they did and I was told to call back Monday to talk with the person that coordinates them to get more information and availability.

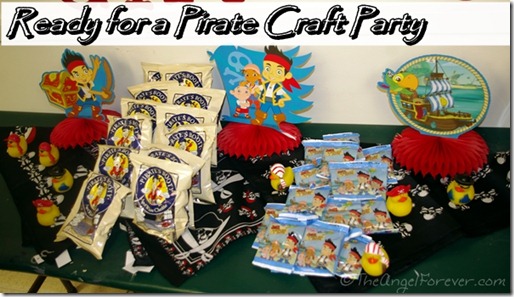
Pirate Craft Party

This is not a sponsored post, we paid for the party completely on our own. I am sharing this to let others know about the wonderful experience we had. To make a long story short, we booked a party at our local Jo-Ann store and it was on June 1. When I booked it, Alex wanted to know what my son liked. I noted he wanted to do something with pirates (again) and that he loves to paint. As I sat in the party room talking about the event, she quickly came up with two crafts for the kindergarten set to make during the two hour party. I would simply need to tell her final numbers closer to the party, bring any decorations, and bake cupcakes and not decorate them. Another fun item, they gave me free postcard invitations to hand out to the kids.

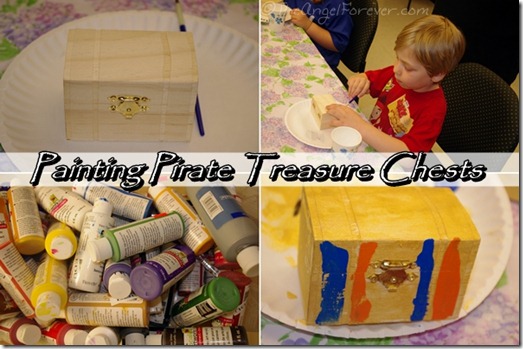
We arrived for the party and the first craft was already set up. Each spot at the table had a small wooden treasure chest waiting for the kids to paint. While everything was getting set up, I worked on the snack/goodie table making the theme pretty obvious. As soon as the kids arrived, Alex and another woman (also named Alex) got started giving the kids directions and putting paint onto their paper plates to begin.

Painting Pirate Treasure Chests

TechyDad and I were beyond impressed with the variety of paints. If a color was running out, they got more and made sure the kids were happy. The two women were beyond patient with the kids and always helped them when they asked for something. When JSL wanted to write something on top of his treasure chest, Alex got a permanent marker and helped him to write on it where the paint dried.

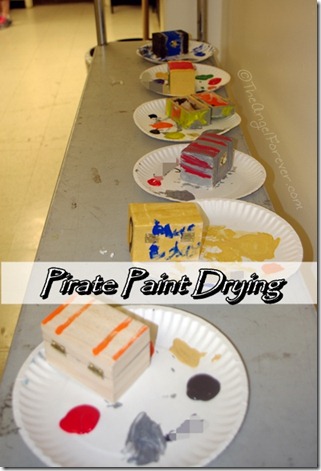
Painted Treasure Chests

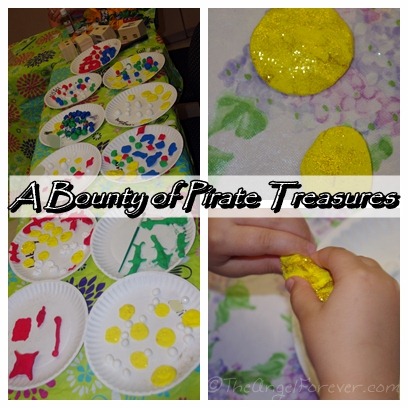
While the treasure chests were drying, it was time to make some jewels and doubloons to put inside them. The kids would be using Crayola Model Magic. To make it sparkle and look more like pearls, gold, emeralds, sapphires, and rubies – Alex had the kids mix in some glitter. This worked beautifully. The kids worked for quite some time making their items to take home.

Pirate treasures from Crayola Model Magic

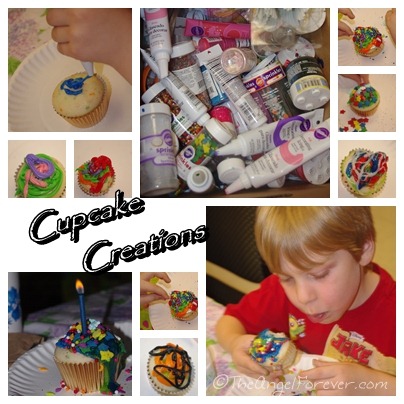
Next, it was time to create some cupcake memories. Each of the kids was given a cupcake that needed to be decorated. They were allowed to ask for any color frosting that was available. They had a lot of colors in regular frosting, plus a bunch of fun glitter gels. Then once the kids had put on their frosting and gels, they were able to pile on some fun sprinkle varieties.

Kid decorated cupcakes at Pirate Party

JSL continues to talk about his party and already wants to plan for next year back at Jo-Ann. As a parent, I loved the ease of the planning and the interactive nature of everyone that works in our store. A huge thank you again to Alex and everyone else at our local store for making my son’s pirate dreams come true.

It's Me

If you are interested in learning more about the Make it a Party at Jo-Ann Fabric and Craft Store, you can check out the information here. As I noted earlier, we paid for our party and felt it was a wonderful deal. The link is to the information that I found when I decided to schedule our party.

Share:
Share on Facebok
Share on Pinterest
Share on Google+


Crochet Granny Square Invasion

I have a confession. I have not picked up my knitting needles since March. It isn’t that my life long love of knitting has gone away. I simply have a new yarn passion. I now consider myself a hooker… –er crocheter. Most evenings, I find myself with my hook in hand working on a project with yarn to decompress at the end of a busy day. Crocheting does not bothering my wrist injury, so it seems to be a better fit in my life right now.

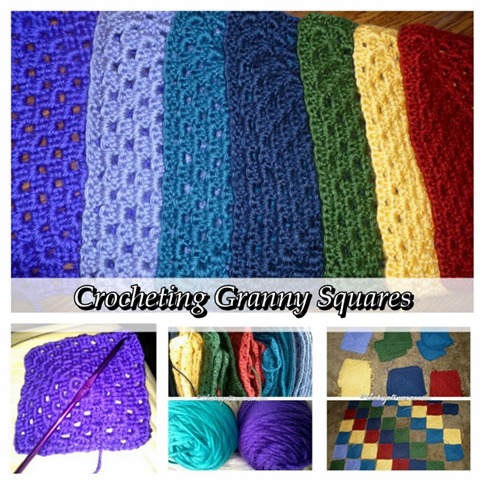
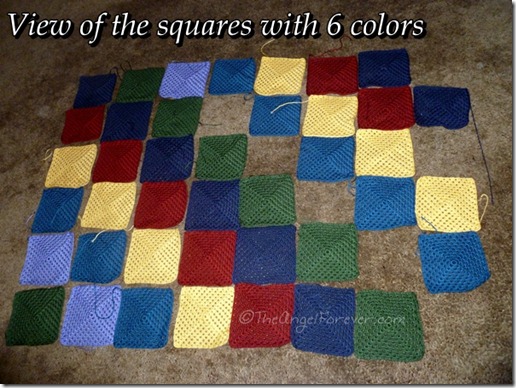
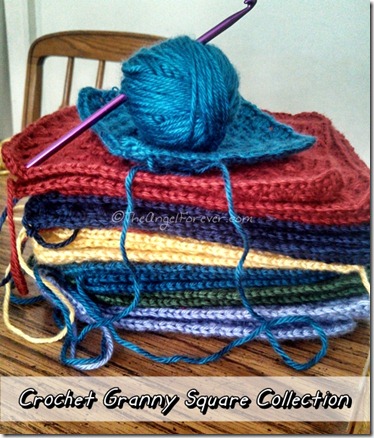
What started as learning how to get a rhythm with crochet and trying a granny square, has warped into a large project that keeps on growing. At first, I used some recycled yarn from another project. Then, I kept adding new colors. To date, I have used eight colors and made 62 squares. Each of the squares is about 7 1/2 inches. I have 10 more squares to make with the colors currently in my house. Here is a peek of what I have done.Crocheting Granny Squares

As you can see in the photo on the bottom right, the patch work granny square afghan was not big enough. That’s when I went out to add the two new colors seen in the bottom middle. Just to share all of the colors, I put them in a semi-rainbow order to display. I know I am adding a deeper yellow/orange color to the mix and may add a lighter peach/coral color in before connecting them together.

So yes, aside from three small dish cloths, this is my first crochet project. It is a large one, but it will be fun to see finished. Now I just have to get all of the squares set, figure out a pattern, and actually connect them. Oh and that is another debate.

Granny Sqaure Crochet Project

What will my next project be? Well, my little guy has requested a Pete the Cat doll that I found online. If you have any suggestions, I would love to hear patterns that you love. Meanwhile I need to decide, should I make the textured single crochet connect in gray or black?

It's Me

Share:
Share on Facebok
Share on Pinterest
Share on Google+


Making Time for Me

Raise your hand if you often forget to take time to put yourself first. No really, I’m being serious. I think the majority of us could probably say that with the hustle and bustle of our every day lives we tend to neglect our own need for a sort of time out.

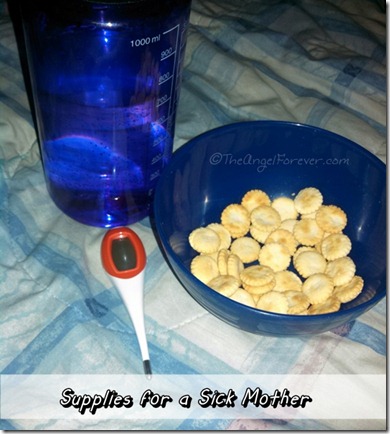
While the boys were on Spring break, the stress of some items in the weeks leading up to it left me sick. I had a fever, chills, aches, and was miserable. Thank goodness NHL and JSL were amazing during that time and played together and make sure I was able to rest. Sick Mother Supplies

After being sick, I was unable to travel with TechyDad and the boys to a family birthday party that was out of town. I was home alone the entire day. The house was quiet and I had time to do what I wanted to do. I had no work to get done and could rest, relax, and unwind.

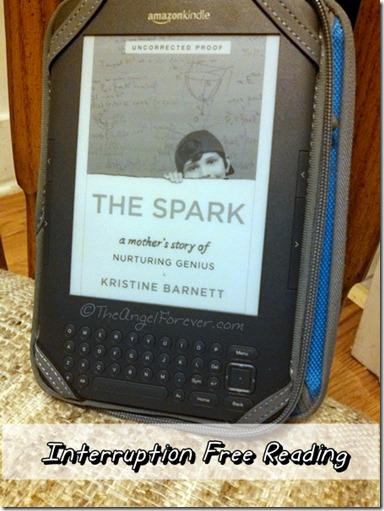
Imagine this…time to read with no interruptions.

Reading with no interruptions

Yes, it happened and I was not attempting this at night when my eyes were heavy. Many times, I fall asleep reading a book. It isn’t because the book is bad, no it is because I was so exhausted. TechyDad has had to close a book, move my Kindle, or pry my phone and Kindle App out of my hands while I was sleeping too many times to count.

Then, I had control of the remote, Roku, and Netflix. There was no giving in to watching something the boys wanted. I was able to play some more catch up on Arrested Development since new episodes are coming in May. Oh and while I was watching, I could work on some of my crochet project.

Crochet Granny Squares

While I never wish I was sick, I enjoyed the quiet day to just relax, recoup, and do things that I enjoy. Had I been feeling better, I would have added a long walk while listening to an audio book.

So, what would your perfect YOU day look like? Think about it and remember that from time to time we all need to put ourselves first to make sure we do not crash and burn.

It's Me

Share:
Share on Facebok
Share on Pinterest
Share on Google+


Fun Times Making Slime

During the summer months, I looked to Pinterest a lot for ideas. I was searching for items to do with the boys if it was too hot, rainy, or to save for the winter months if we were snowed in. I pinned craft items, science items, writing items, books, and fun recipes. Most of the time, I would just pin them into a board so I could check back later. There was one instance when I immediately went out to get supplies.

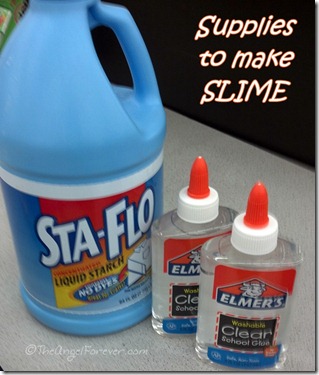
In July, someone pinned Tot Treasures’ post about making Slime. I was in love with this idea. Both of my boys love playing with Playdoh, Silly Putty, and other similar items. So, I noted the two ingredients that we needed and bought them when I found a store that had them.

Supplies to make slime

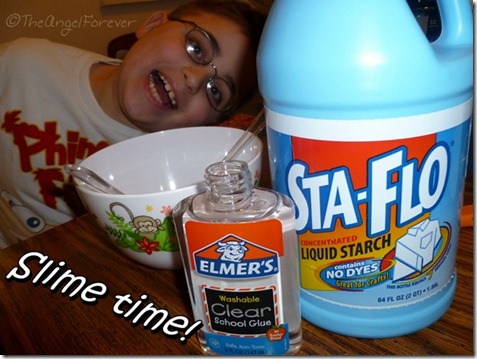
For some reason, we never made the slime before the boys started back to school. This week, I really wanted to test it out since the kids were home for February break. Saturday afternoon, the kids were restless and it was raining outside. We tried a craft kit that I bought and it flopped miserably. Thanks to this, I pulled out the liquid starch and clear glue. NHL was very excited about this process.

Time to make slime

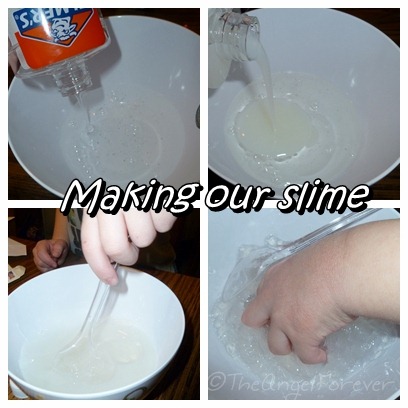
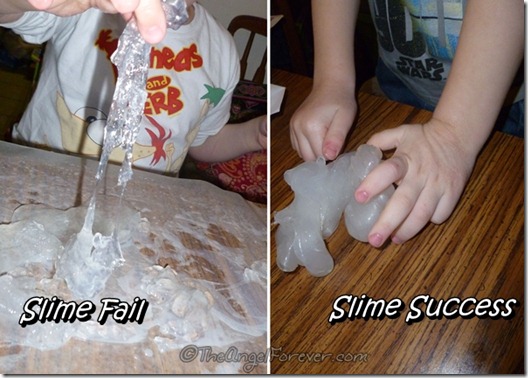
It had been months since I read the post, so I quickly went to Tot Treasures for a refresher. Basically, it is equal parts of glue and liquid starch. I say basically because we learned that is not always the case (had I read the comments again, I may have avoided the mistake). Making our slime

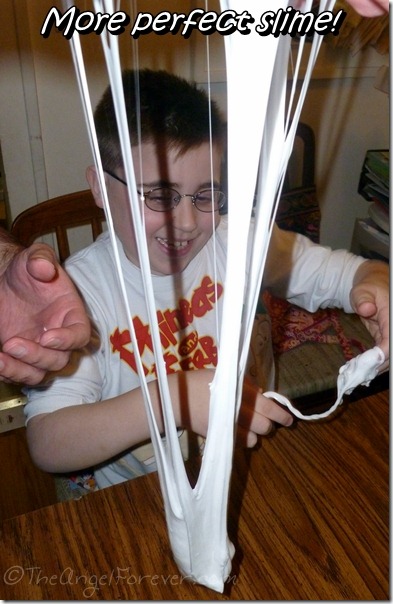
The process is really kid friendly, but sometimes you have to wait a bit for the glue to absorb the liquid starch (apparently humidity factors into this as well). If you put too much starch in, you can always add more glue if you have any more. If not, you may notice that the slime is a bit too wet and lumpy. It does not smooth out. We figured this out after the first batch of slime and made a perfect second attempt.

Batches of Slime

JSL’s second batch came out perfect. Meanwhile, NHL’s first batch was a mess, literally. We did not have additional clear glue to put into the mixture. So I went on a search for more glue in the house. I found a container of white glue and set to make him more slime. How did the white glue compare? Well, here is the result below.

Slime with white glue

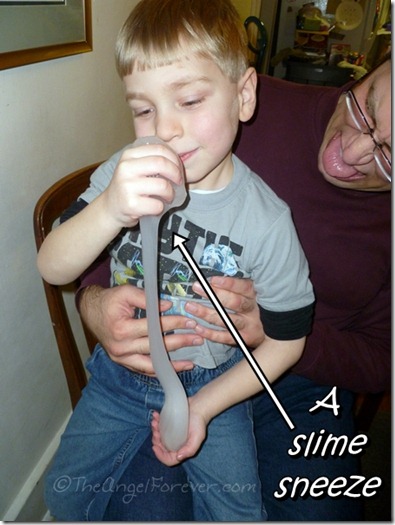
TechyDad said he actually liked the consistency of the white glue more, even if it stayed a bit more sticky. The “recipe” noted using food coloring, but we opted to skip this step. Our goal was for fun without making colorful hands this time.  JSL also figured out a fun way of playing with the slime. ACHOO…

Slime sneeze

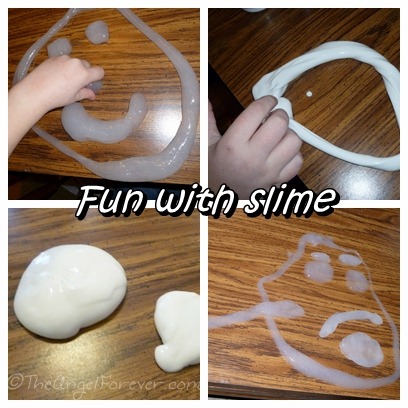
What did the kids think? Well, they played with the slime for almost three hours until we forced them to clean up for dinner. Creative slime time

Yes, they had fun laughing, playing, and being creative with their slime. After three hours, we packaged up the slime in containers and are going to see how it holds up for another day of play.

Have you ever made slime before? I would love to know your thoughts on this fun activity.

It's Me

Share:
Share on Facebok
Share on Pinterest
Share on Google+


100th Day of School Project

A few weeks ago, I mentioned to TechyDad that we had not seen anything from school about the 100th Day of School. I was sure that I had seen kindergarten children doing things last winter, so I knew it would be coming. Sure enough, a week ago, JSL came home with a sheet announcing the project and when it was due.

When NHL did his kindergarten project four years ago, he made a banner to bring into school. We went to the craft store and picked out a few items to make it work. JSL’s teachers reminded families that it should not cost a lot and hinted at multiple ways to go with this. The minute the kindergarten kid heard the option of making a book, he was sold. YES, he even asked if we could laminate it.

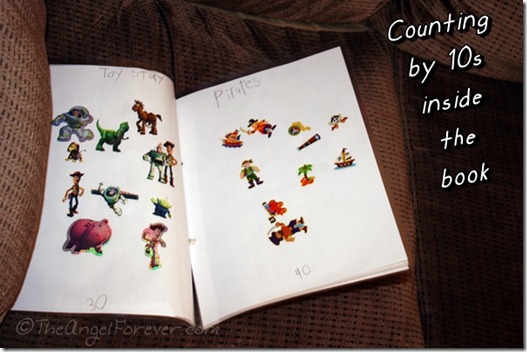
JSL and I brainstormed on items that he could use within a book. We both agreed that stickers would be a lot of fun. We pulled out my giant sticker box from teaching and began our search. He picked Winnie the Pooh, pirates, Disney, penguins, animals, hats from around the world, dinosaurs, and snowflakes.

Inside the 100th Day of School Book

We did allow JSL to get three new packs of stickers for his book. He really wanted new Toy Story, rainbows, and shiny smile faces. Everything else was already at home, or at Nana and Papa’s house (they had the pipe cleaners to bind the book). Once he was finished with each grouping of ten stickers, we moved to the next page. Then, we went back and JSL wrote titles on each page and counted by 10s on the bottom of each page. When he finished all of these, we pulled out a front and back page for the book.

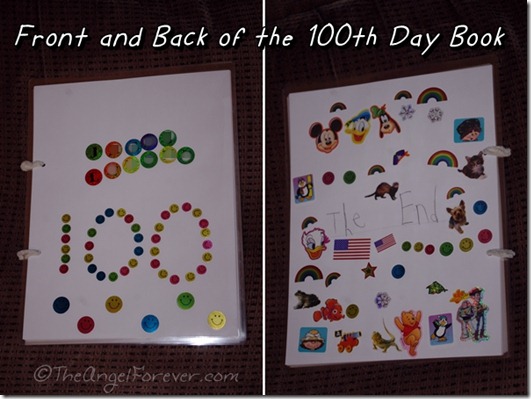
JSL wanted to use the ABC stickers to write his name. Then, he used the new smiley faces in patterns around the number 100. The back, was just a fun end to the book with random stickers that were left over from inside.

100th Day of School Project Book

Once JSL was finished, I went to the thermal laminator that we have and put pages back-to-back to make the six pages. Then, a hole punch was used and pipe cleaners helped to connect everything together. This was the perfect project for JSL who loves to make books. Thanks to the laminator, he will be able to keep it to remember what he made in kindergarten.

So my question to you this week:

What are some of the 100th Day of School projects that your children have done, or you have seen? I love hearing about different options since I’m sure we will have another one to do down the road.

It's Me

___________________________________________________________________________

Thanks to Kailani at An Island Life for starting this fun for Friday. Please be sure to head over to her blog to say hello and sign the linky there if you are participating.

Aloha Friday by Kailani at An<br<br /><br /><br /><br /><br /><br /><br /><br /><br /><br /><br /><br /><br /><br /><br /><br /><br /><br /><br /><br /><br /><br /><br /><br /><br /><br /><br /><br /><br /><br /><br /><br /><br /><br /><br /><br /><br /><br /><br /><br /><br /><br />
    /><br /><br /><br /><br /><br /><br /><br /><br /><br /><br /><br /><br /><br /><br /><br /><br /><br /><br /><br /><br /><br /><br /><br /><br /><br /><br /><br /><br /><br /><br /><br /><br /><br /><br /><br /><br /><br /><br /><br /><br /><br /><br />
    Island<br /><br /><br /><br /><br /><br /><br /><br /><br /><br /><br /><br /><br /><br /><br /><br /><br /><br /><br /><br /><br /><br /><br /><br /><br /><br /><br /><br /><br /><br /><br /><br /><br /><br /><br /><br /><br /><br /><br /><br /><br /><br /><br /><br /><br />
    Life

Aloha #240

Share:
Share on Facebok
Share on Pinterest
Share on Google+