Category Archives arts and crafts

Ready for Crochet Wristers

My love for all things crochet has really taken off. Part of this is thanks to a great community called The Crochet Crowd. While I used to sit and wonder how I would ever be able to make things everyone shared in the group, I now makes lists of the next item to tackle. Part of the beauty of The Crochet Crowd is the gentleman who started it: Michael Selnick. Mikey is a master of crochet tutorials who helped me to ditch my knitting needles (for now) and finally learn to crochet. The video tutorials are amazing and have allowed me to not only make my giant Rainbow Granny Square Afghan, but multiple other items including the following:

My Wristers Model

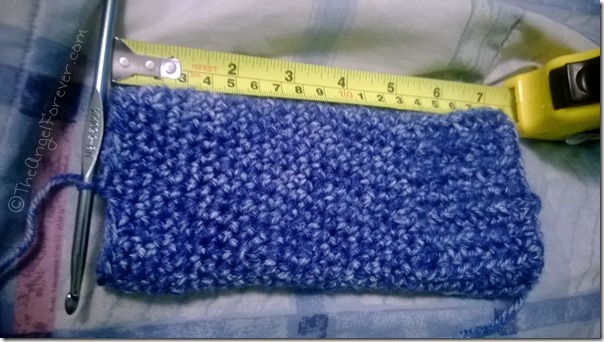
Last week I realized I did not have much of a yarn stash in the house and wanted to start something. The next big project I want to attack is an 8-bit granny square blanket, but the planning is taking a bit more time.  I found the vibrant blue yarn that I had bought some time ago and decided to try a new technique. I used two skeins and made a corner to corner scarf (variation of a Red Heart pattern in this tutorial). Once that was finished I got the guts to try the Crochet Wristers (using the Give em Spirit Crochet Wristers tutorial). This pattern also happens to be the Challenge on The Crochet Crowd right now and hundreds of pairs have already been created in just a weeks time.

I can not believe how easy this was to make. Once I had the yarn on my hook, it just took shape before my eyes.

Wristers

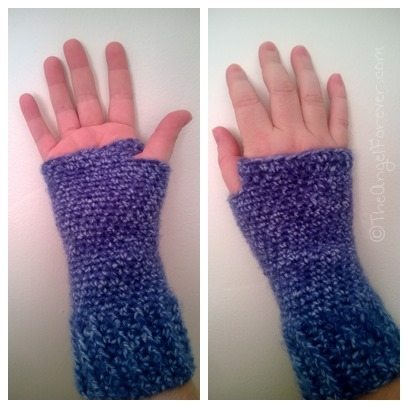
I was a little nervous about the thumb area, but it was not difficult thanks to Mikey’s tutorial guiding me through it. Once I was finished with the first one, I tried it on and took a few quick photos.

First Wrister finished

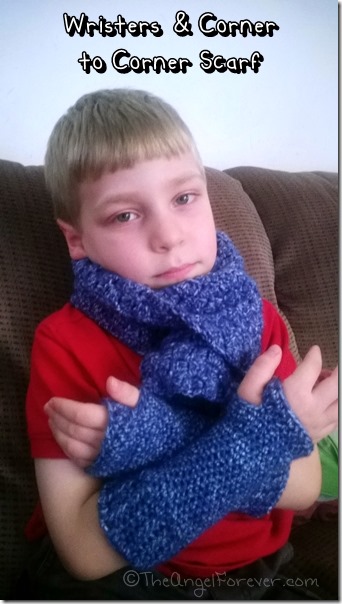
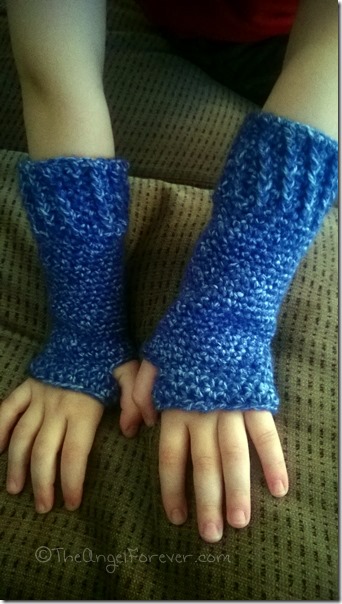
Then I took a little break and eventually grabbed my hook and yarn and made the second for the complete pair. Once they were finished, a certain six year old declared that they were his. He said they made him a super hero and went flying around the house. He stopped just long enough for the photo below and the one at the top.

Wristers Finished

Of course, once you make one child a pair of wristers, chances are the other child will also want a pair. Hmmmm….there may be a book on this with a Mouse and a Cookie. Anyway, more yarn was purchased that the big kid selected. Plus, I bought a few additional skeins to start making additional pairs for gifting.

If you were to receive a pair of wristers, what would your dream color combination look like?

It's Me

Share:
Share on Facebok
Share on Pinterest
Share on Google+


Making Granny Square Bags

Crochet projects have been on my mind a lot this summer. Even before I finished making my Rainbow Afghan, I had something in the back of my mind for my next project. I knew that I wanted to do more granny squares since I really enjoy them. I can make them on the go and eventually work them together into something larger and more complex.

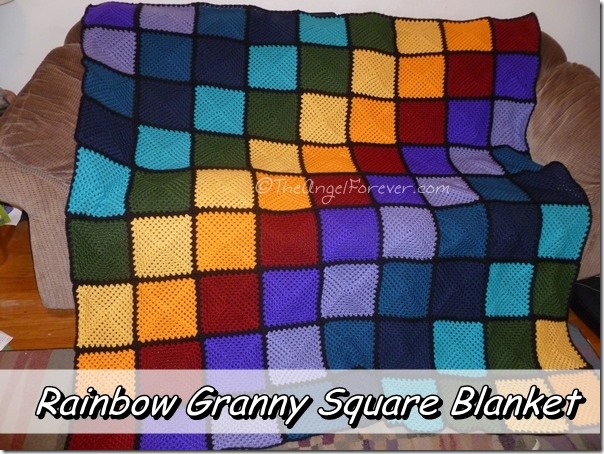
Finished Rainbow Granny Square Crochet Blanket

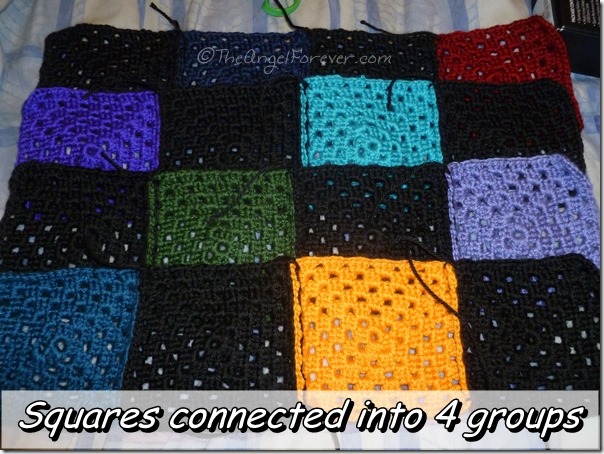
I searched on Ravelry, Pinterest, and YouTube for something that called my name. In the end, I decided to try a pattern called Inga’s Crocheted bag (pattern PDF here) using smaller versions of the Granny Square pattern from my blanket. I figured that I would make one in cotton yarn eventually, but wanted to test the pattern with left over yarn from the blanket that I had just made. So I made sixteen squares with the yarn scraps that I had. I was able to make half of those in the colors and half with the larger amount of black that remained. Once all of the squares were complete, I single crocheted them together into four strips.

Granny squares into four strips

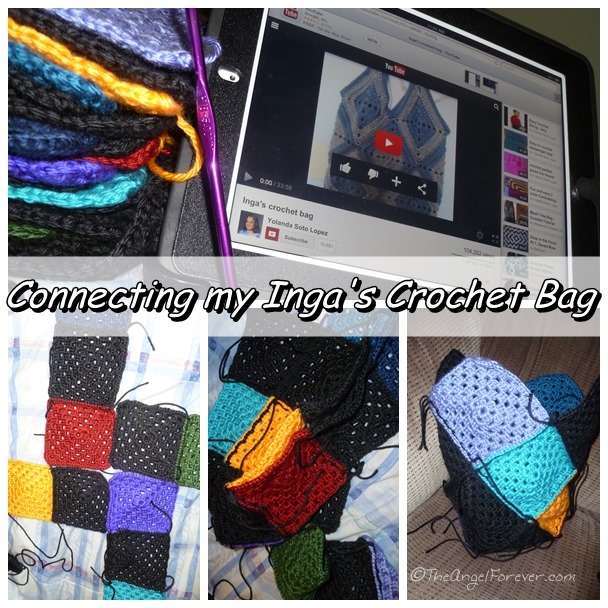
Since I was not completely clear on the pattern and how to put it together, I went to YouTube. Yolanda Soto Lopez made a video tutorial of this bag that helped me to make sure I was on track. This video was very helpful and before I knew it the bag was coming together. Making the Inga's Crochet Bag

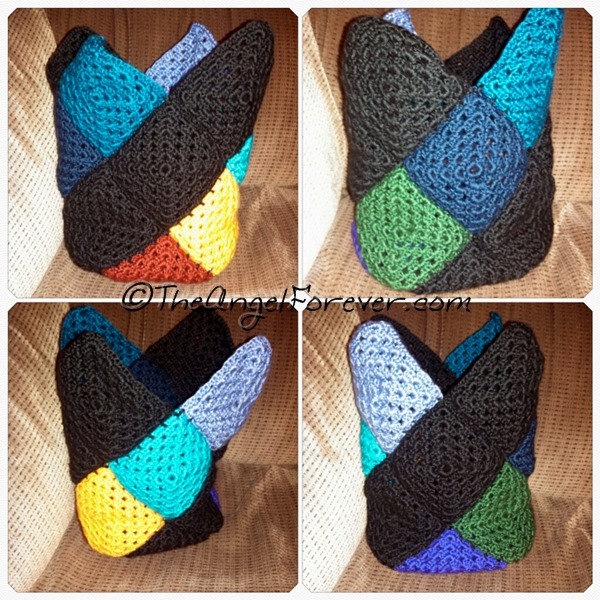
Next, I secured all of the strings on the inside and turned it right side out to see the side of the bag and pattern of the squares from all sides.

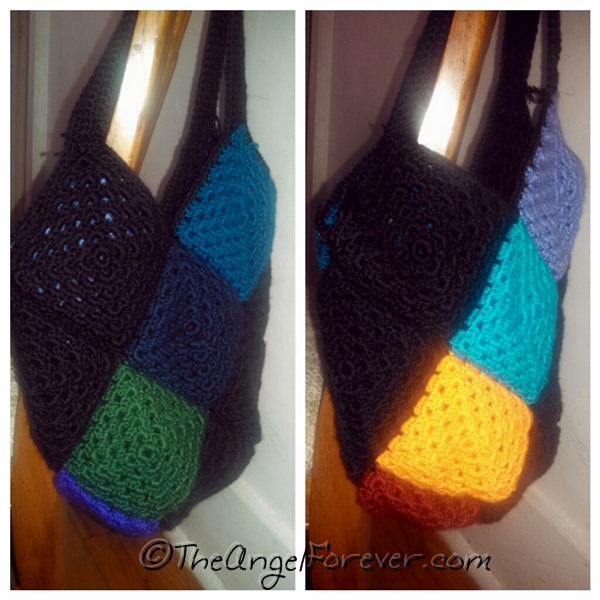
Views of Inga's Crochet bag without straps

The second to last part of making the bag was to single crochet two straps to sew onto the bag. This was tedious to me since I am not a fan of crocheting straight lines, but I got it finished and put them onto the bag.

Inga's Crochet Bag

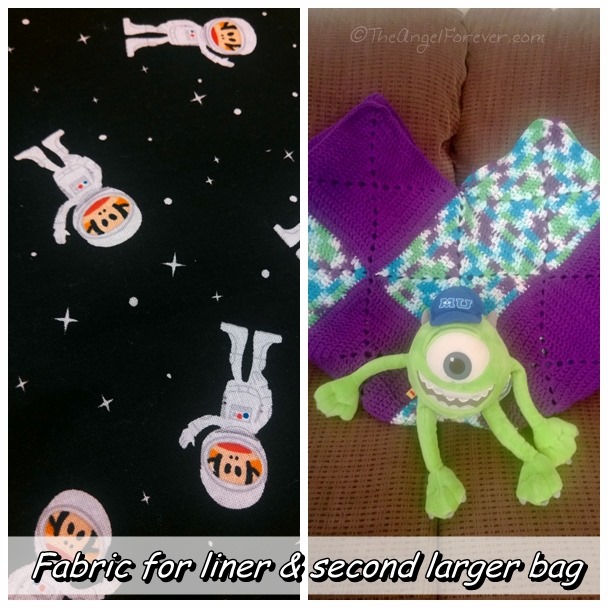
The bag is perfect for a purse. I just want to add in a liner and possibly a button to keep it closed. I am not a fan of sewing, so this may not be finished until after the kids go back to school. I did buy fabric for the inside since I found something that I fell in love with. Of course, I also found cotton yarn and made a rather large bag using the squares that are called for in the pattern and only have to complete the straps for that one.

Crochet bag liner and another Inga Bag

Needless to say, I have already asked TechyDad if he will help me to figure out my next crochet project. This time, I want to do something 8-bit style using solid colored granny squares. So the geeks that we are need to do some math and work to make that happen before I can buy my crafting supplies.

It's Me

Share:
Share on Facebok
Share on Pinterest
Share on Google+


Kids and Knitting Looms

My youngest son adores arts and crafts of all kinds. If there is the opportunity to create something, he will jump at it. JSL also likes to sit and watch me knit or crochet. He helped me with my fist big crochet project that I was working on many times. He was my model to help me share how big it was getting and then determine which pattern to connect the granny squares in. JSL wants to learn how to knit or crochet, but I thought just six is a bit young for this. Since the coordination needed is high, I did not want him to be too frustrated. So, for his birthday in May, I bought him a knitting loom to try.

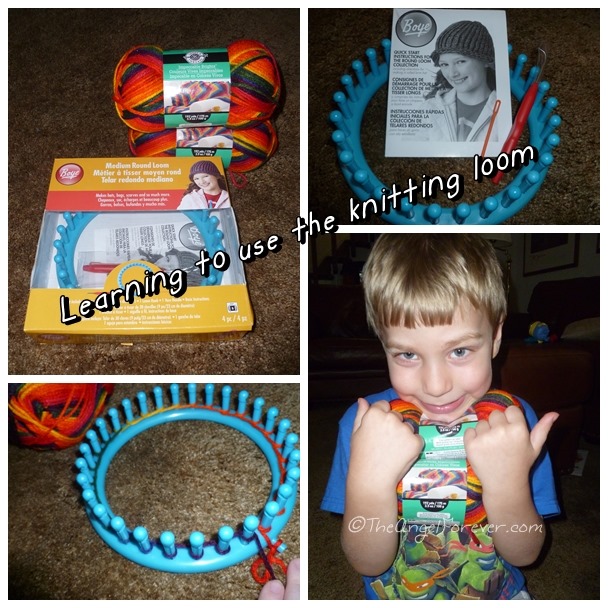
When I gave JSL the present, part of the deal was we would go to a store and purchase yarn together. We did this and then we never had the chance to really try the loom together. The heat wave changed this. While trying to keep cool inside, I took the loom and yarn out and we got started.

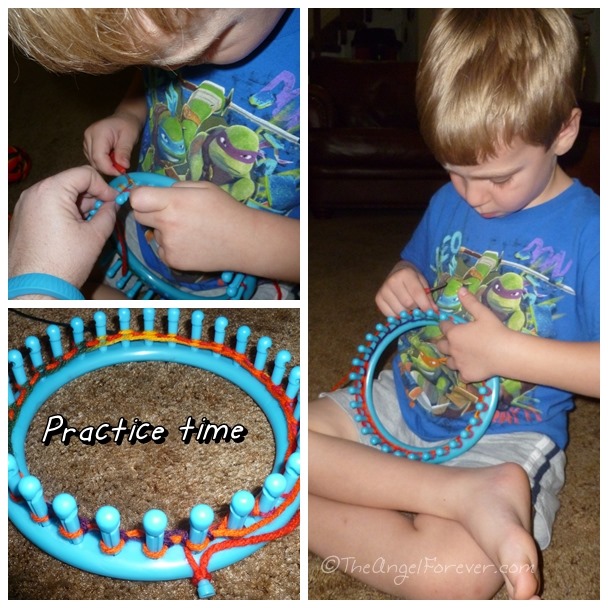
Learning to use the knitting loom

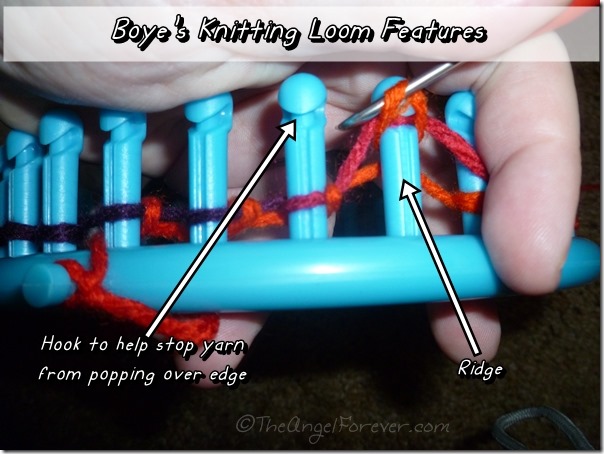
Yes, that is the color that the kiddo wanted when we went to the store. He wanted rainbow style and so we bought some to get started. The instructions for the Boye knitting loom was really easy to follow. I started the process by weaving the yarn around the first time. Then, I showed JSL how to move the circle around. What we both really liked was the top of the loom that had an area to catch the yarn as you were pulling the other strand over. This was missing on another loom that I had at home and it was frustrating to him when the yarn would pop off. There was also a ridge down the middle to help grab the yarn to pull over with the loom hook.

Boye's Knitting Loom

At first, JSL had a hard time figuring out how to hold the loom, the yarn, and the loom hook to work. With some trial and error, we found something that worked well for him. While it may look a little awkward, it was working quite nicely for JSL.

Practice time with the knitting zoom

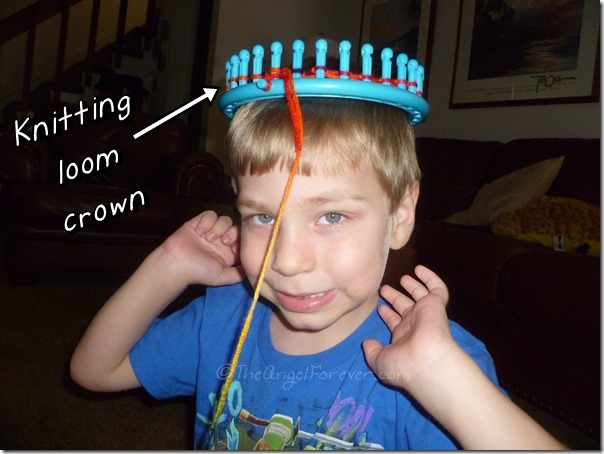
After a little while, JSL had gone around the loom and was ready to take a break. Insert silly six year old knitting loom humor. I do believe this photo pretty much sums it up.

Knitting Loom Crown

More updates coming as JSL continues with his knitting loom learning. If you have used a knitting loom with kids, I would love to hear advice or project suggestions to do with my little guy.

It's Me

Share:
Share on Facebok
Share on Pinterest
Share on Google+


Granny Square Rainbow Afghan

Have you ever wanted to learn to do a craft and just never been able to accomplish it? For the longest time, that was learning how to crochet for me. I have been knitting since I was in elementary school, but the lure of the hooking kept me going back and trying every so often. I bought books and even had several people try to show me how. Then, YouTube videos really made everything click. Since early March, I have hardly held my needles, instead a hook has been in my hand most of the time.

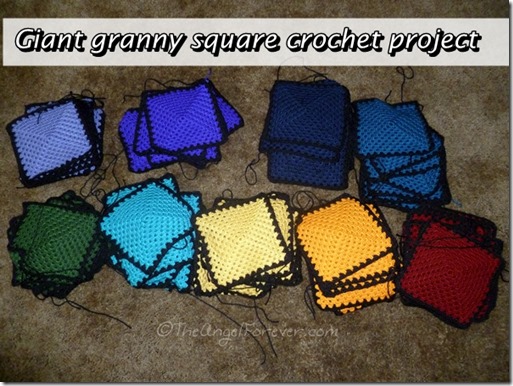
After making one cloth with some cotton yarn, I jumped into trying to make crocheted granny squares. I used colors from a project I was recycling and then slowly added more colors. When I wrote my last post about the project at the end of May, I had used seven yarn colors and was debating what to do. Since that time, I used two additional colors. By July 1, I had finished making 81 granny squares in nine colors. Each square has ten rounds and are rather large, especially after a border round of black was added.

Giant granny square project

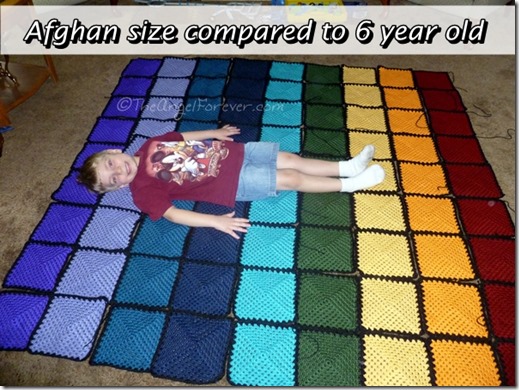
When the squares were finished, I brought them to Nana and Papa’s house to spread them out on their floor. I was not entirely sure how large the afghan would be. I had measured it on our queen sized bed, but it was a guesstimate.

Granny sqaure afghan

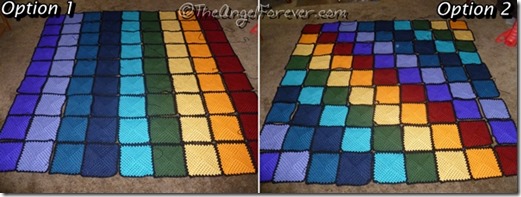
As you can see, I placed the squares in a rainbow like pattern to begin. This was the easiest way to go. After that, I changed it up a little. With TechyDad’s help, we moved them around and came up with a second option. Both of these can be seen below.

Crochet afghan options

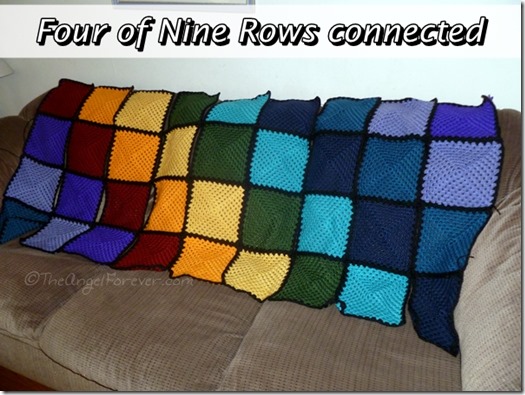
In the end, TechyDad and I both liked the more funky pattern. As I mentioned before, this is my crochet project of any size really…and it is huge! Putting this together scared me a little since I have never done anything like it. Thanks to the crochet tutorials on YouTube from The Crochet Crowd, I was able to watch Mikey explain how to single crochet connect them. Before I knew it, I had four rows finished. I took it over to our couch to share a sneak peak of the afghan.

Putting Granny Square Crochet Blanket Together

More work continues and I hope to finish soon. Then, I really want to finish the afghan that I was knitting. I’m not sure what I am going to do after that, but no doubt I will figure something out.

If you have any favorite crocheted projects, I would love to know. I am always looking for new items on Pinterest, Ravelry, and other locations.

It's Me

Share:
Share on Facebok
Share on Pinterest
Share on Google+


Exploring with Watercolors

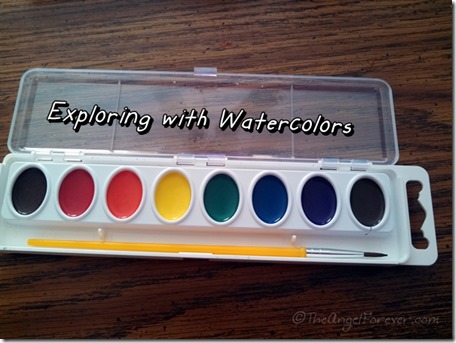
Summer vacation is here and, when the weather is nice, we try to head outside as much as possible. Of course, lately Mother Nature has been giving us a lot of rain. The other day, I stumbled upon an unopened package of watercolors. Thank goodness, I was able to find another unopened Crayola watercolors so each of the boys would have their own.

Exploring with Watercolor paints

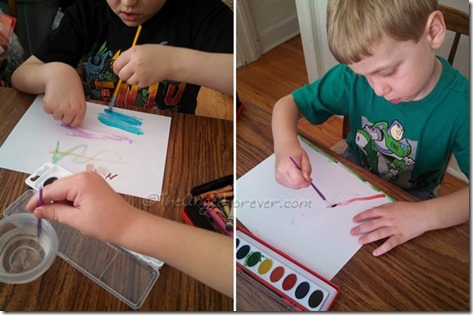
NHL has painted with watercolors before in school. He immediately asked me to have some crayons. He wanted to do use the Crayon Resist method that he learned about. So I pulled out some crayons and let the boys explore the watercolors. As you can see, my little guy was very serious. He was trying to figure out how much water to use to get the vibrancy right.

Watercolors exploration

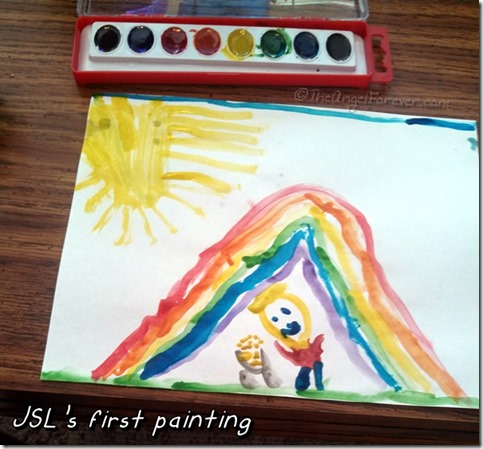
When JSL was finished, this was his masterpiece.

First watercolors painting

The little guy loves to make items with rainbows and, typically, he will show up in those pictures, just like the one above with the pot of gold.

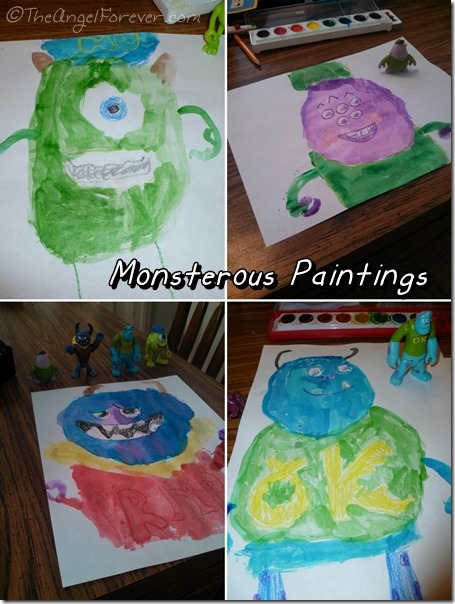
The next day, JSL asked to paint again. This time, he wanted to test out making some of the Monster’s University characters. He pulled out his figures and used them as inspiration. Confession, I did help him a little on these. He is six, but most of the time I simply drew the eyeballs and a few other details in crayons. He did all of the painting. Here are the four that he has done to date.

Monsterous watercolor paintings

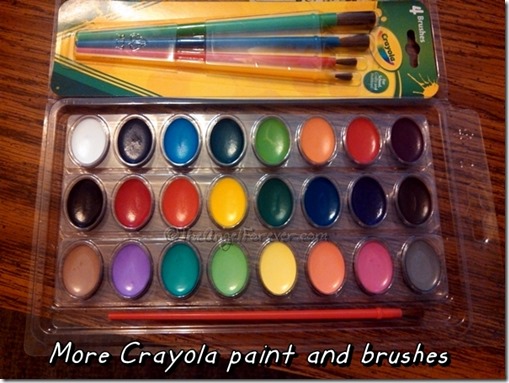
JSL really wanted to protect them, so I pulled out the laminator and tossed the ones he had already finished. In case you were wondering, those are Mike, Squishy, Sulley, and Johnny. To surprise the boys, I just bought them something else to help with the painting. Check out the new Crayola watercolors. Yes, there are actually 24 colors to pick from when being creative. No more being stuck with eight colors.

Crayola watercolors and brushes

Do you or your children like to use watercolors? I would love to know if you do or have specific projects that they enjoy. We’re always looking for more fun projects to try out when the weather keeps us inside.

It's Me

Share:
Share on Facebok
Share on Pinterest
Share on Google+